Backing up and Restoring a Single Database Using SSMS (SQL Server Management Studio)
At the moment, taking backups for a single database is not available in the Control Panel. This article will explain how you can back up and restore a single database via SSMS (SQL Server Management Studio).
Backup
1. Connect to SQL Server via SSMS
Please refer to the documentation Connecting to SQL Server Using SSMS to connect to SQL Server by super user.
2. Back up a SQL Server Database via SSMS
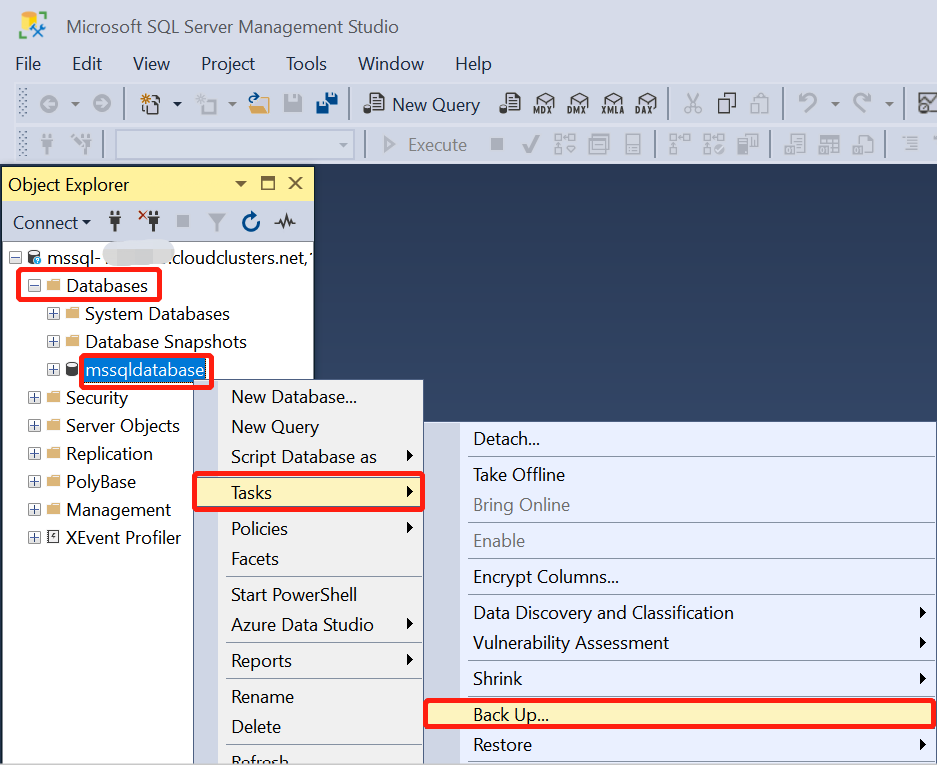
Expand Databases, and either select a user database or expand System Databases and select a system database.
Right-click the database that you wish to backup, point to Tasks, and then click Back Up.... The Back Up Database dialog box appears.
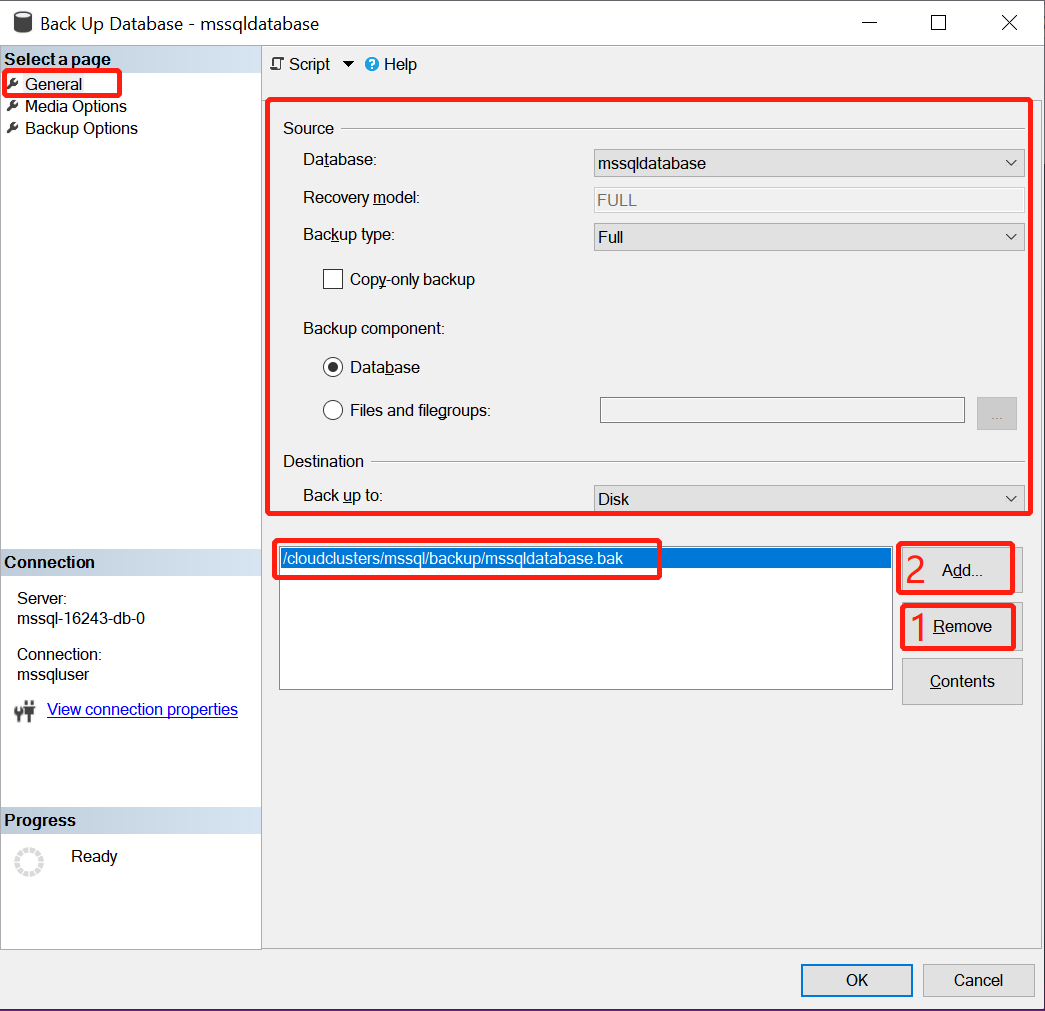
In the Back Up Database dialog box, follow the list below:
On the General page in the Source section, the database that you selected appears in the drop-down list (which you can change to any other database on the server).
In the Backup type drop-down list, select the desired backup type - the default is Full.
Important
You must perform at least one full database backup before you can perform a differential or a transaction log backup.
Under Backup component, select Database.
In the Destination section select Disk from the Back up to: drop-down list.
Select Remove until all existing backup files have been removed.
Select Add and the Select Backup Destination dialog box will open.
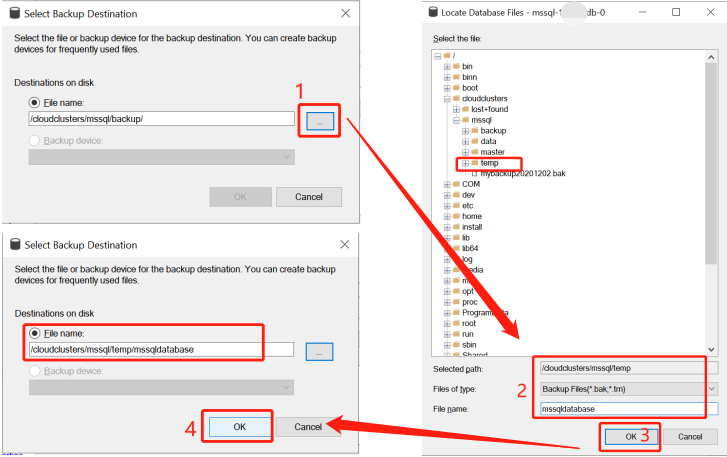
Under File name, select ..., the Locate Database Files dialog box will open.
Enter a valid path and file name in the File name text box and use .bak as the extension to simplify the classification of this file.
Click OK and then click OK again to initiate the backup.

When the backup completes successfully, click OK to close the SQL Server Management Studio dialog box.
3. Modify file permission
Before you can download the file, you need to modify the file permission so you can perform the download operation.
Launch the shell / SSH in the client panel and go to the folder the backup file is in by using "cd
<folder_name>" command.Enter the "ls" command to view all files in the folder
Input "chmod 644
<file_name>" to modify the file permission.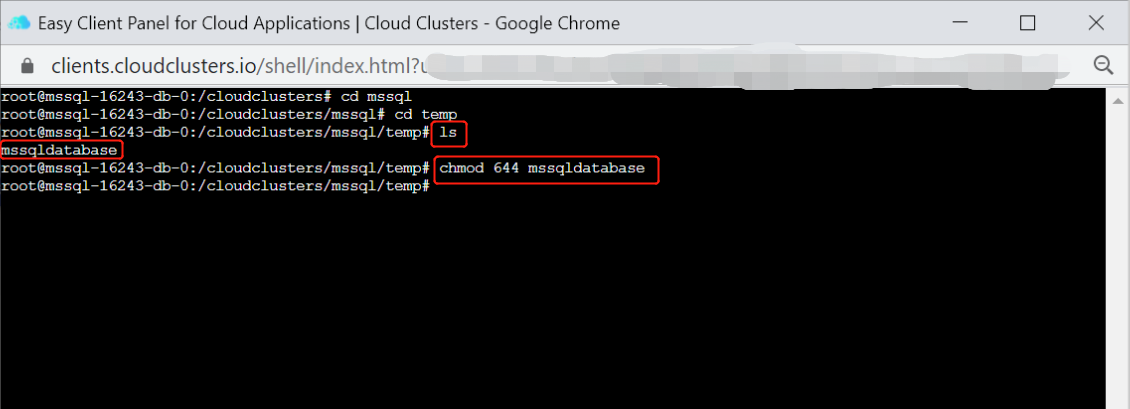
4. Export files
You can download the file on your local machine using FTPS. For details, please take a look at the documentation.
Restoration
1. Transfer your database backup into FTP server
Before you start transferring data, please back up your original MS SQL database to .bak file.
Get the FTPS information on the "FTPS Server" page.
Upload your backup file to the FTP server.
If you need help, please refer to the documentation.
Step 2: locate the database backup file
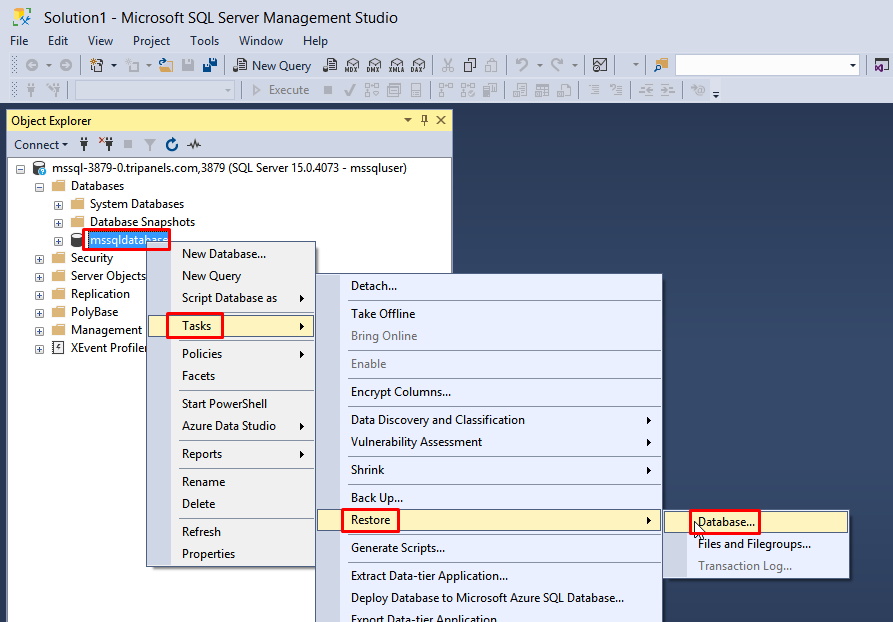
Right click the database name > Tasks > Restore > Database.
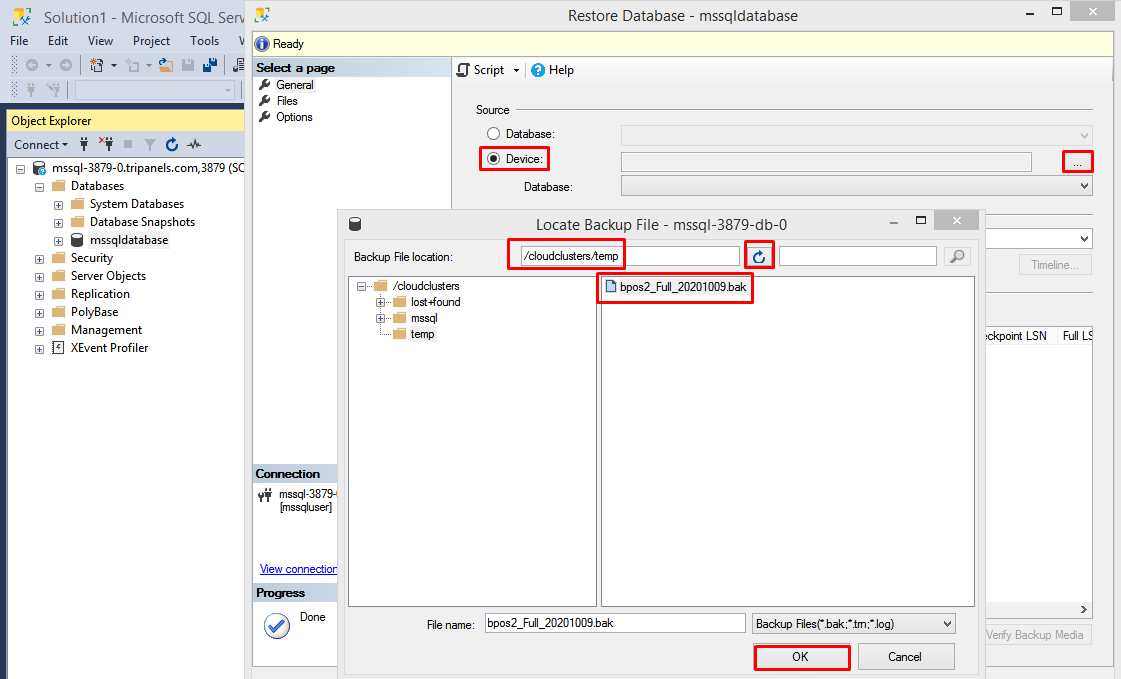
Step 3: restore the database backup
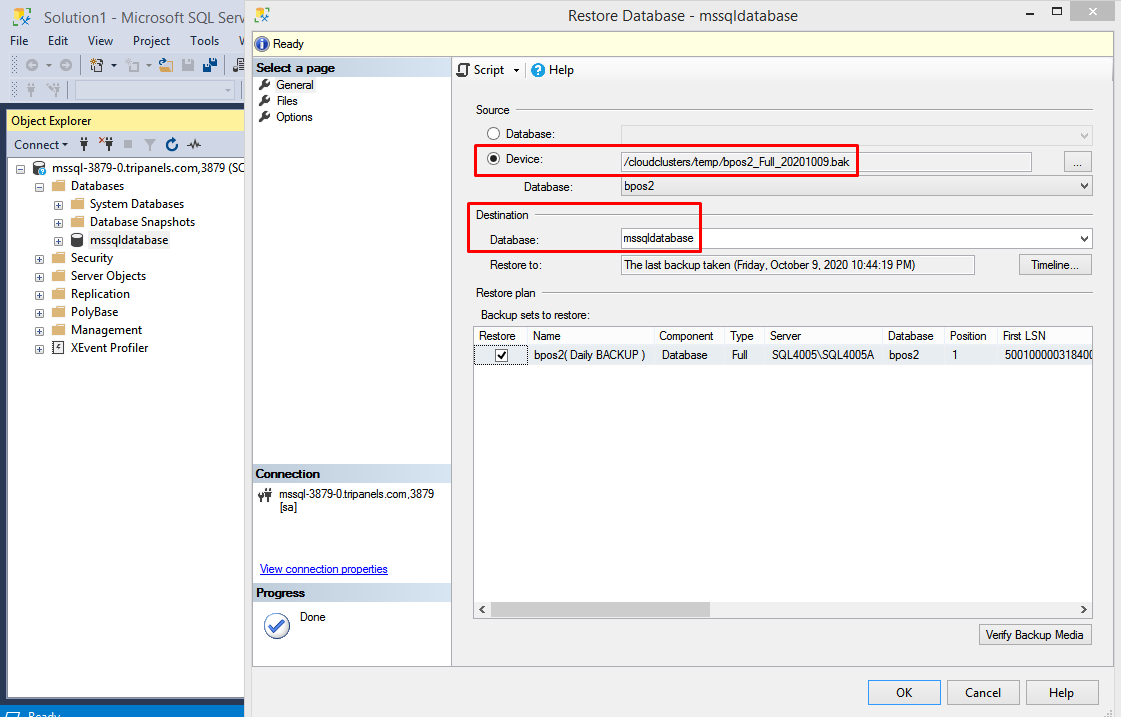
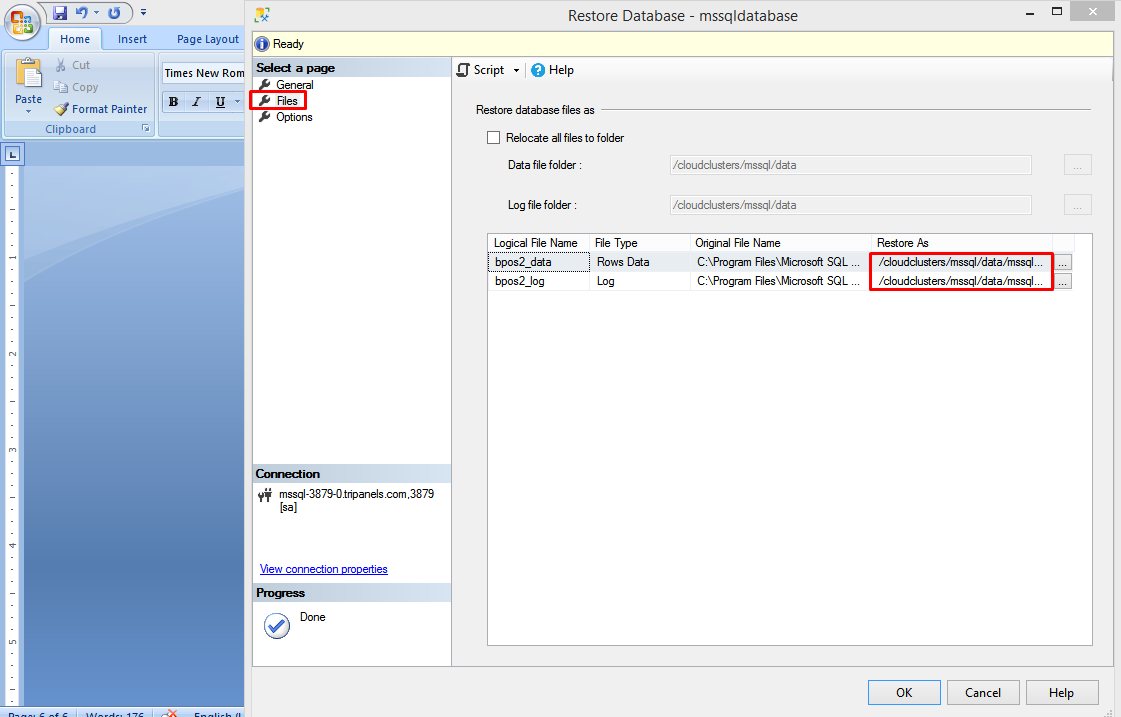
On the Files page, check the file path if it is right. Usually, the data file path is /cloudclusters/mssql/data/{databasename}_data.mdf The log file is /cloudclusters/mssql/data/{databasename}_log.ldf
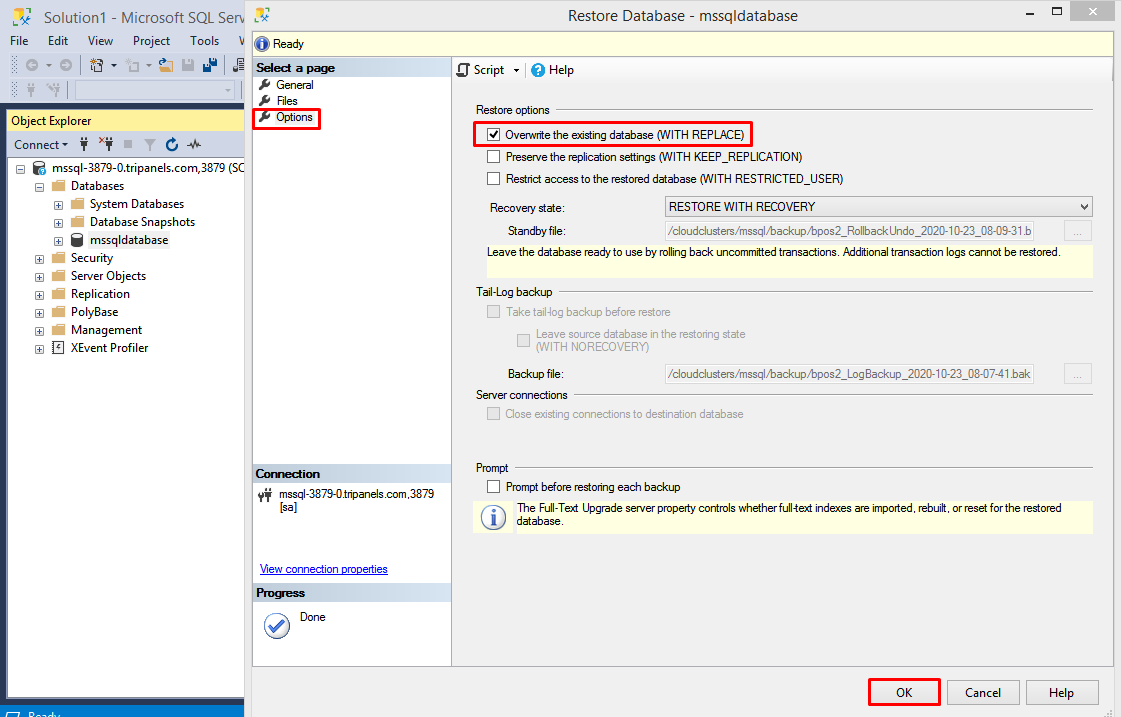
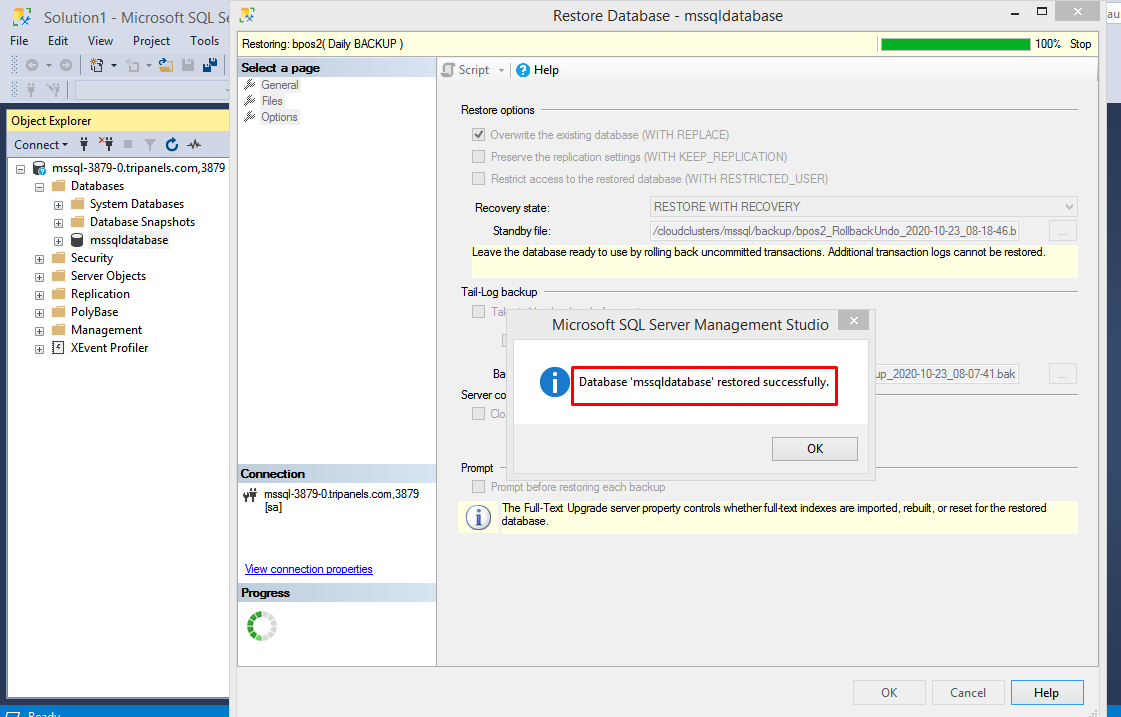
On the Options page, check "Overwrite the existing database(WITH REPLACE)", then click "OK" to start the restoration.
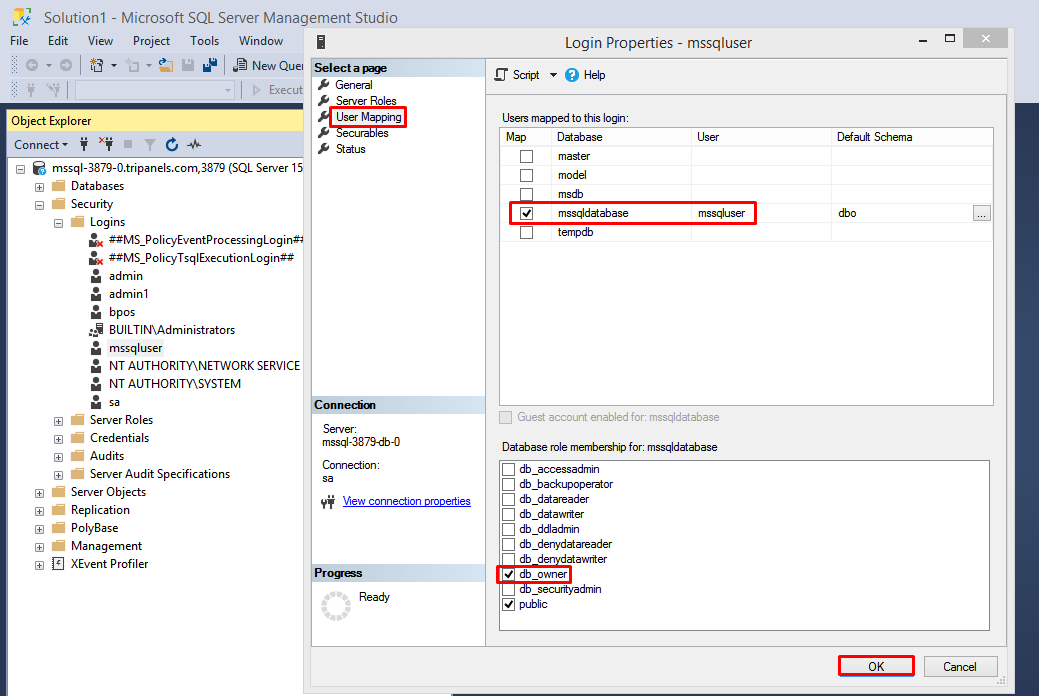
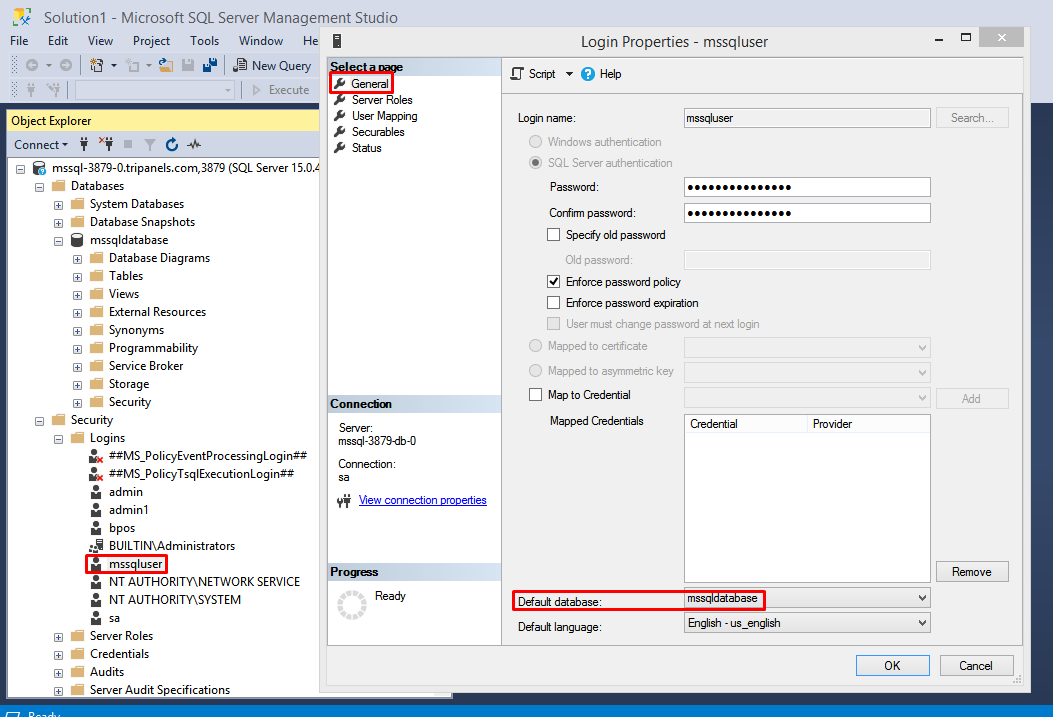
5. Redo the user mapping
Right click the database user under Security > Logins menu. Change the default database to the new database on the General page.
On the User Mapping page, check the right database and user, and add the db_owner role for the database. Click "OK" to save the changes.