Migrate Data into SQL Server Deployment
This article will explain how you can migrate your SQL Server database into SQL Server Deployment.
1. Locate your target deployment
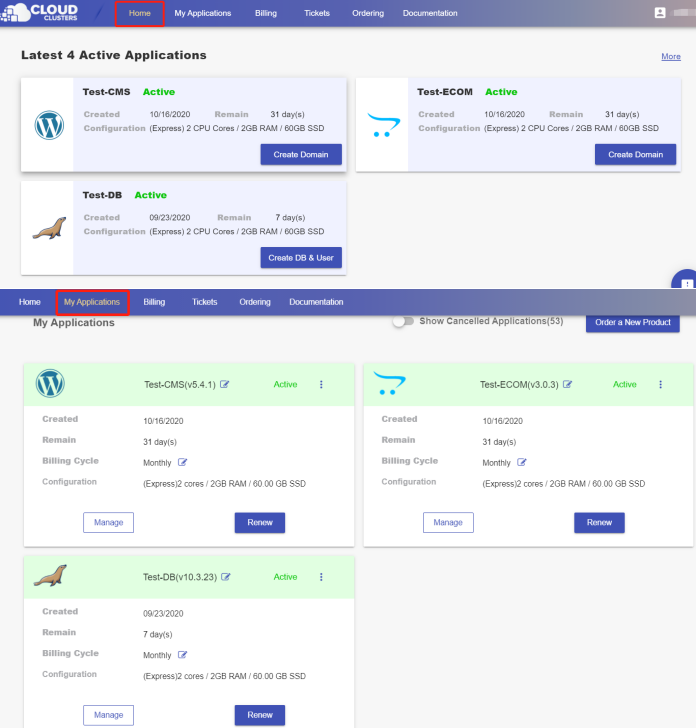
Log in to the Control Panel and locate your target deployment on the Home page or the My Applications page.
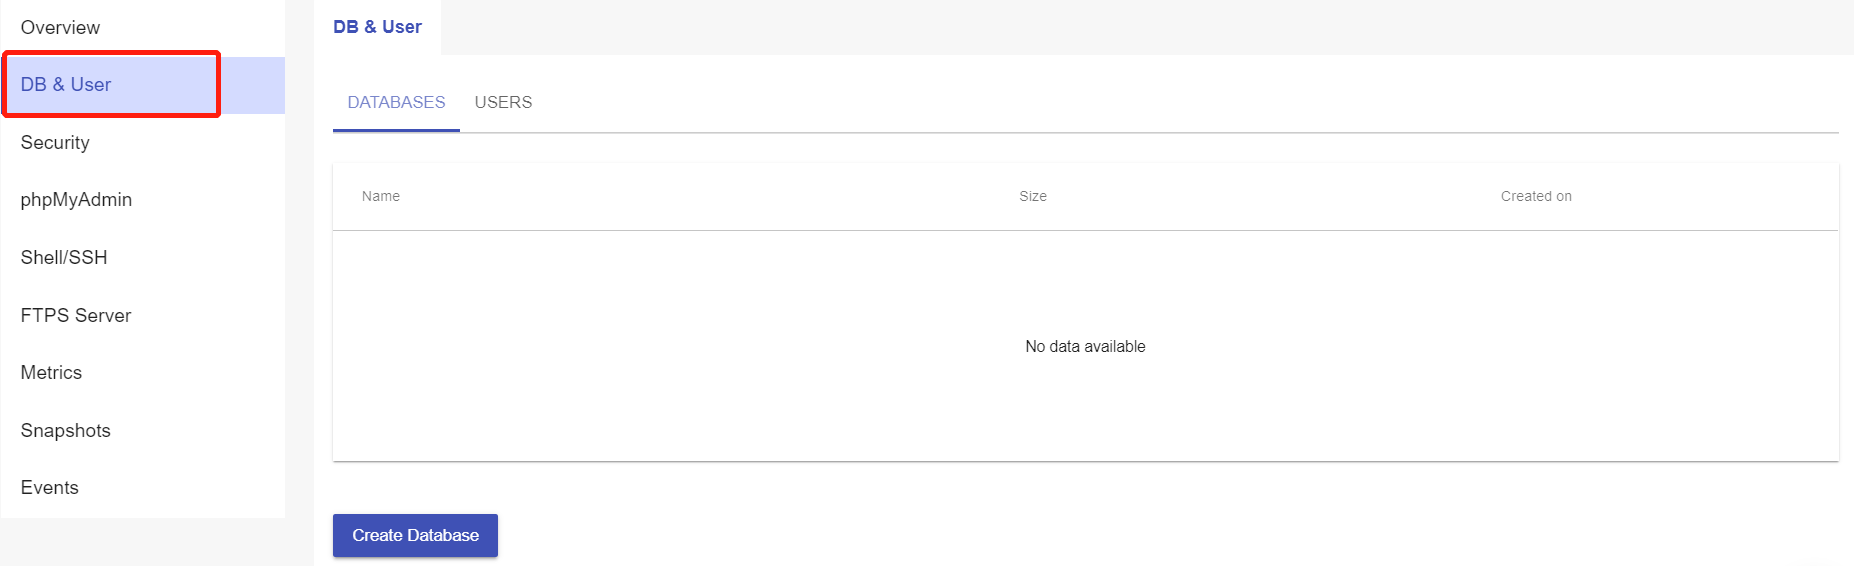
2. Create a database and a super user
Go to the "DB & User" page to create a database and a super user so you can restore your backup file later in the platform.
3. Transfer your database backup into FTP server
Before you start transferring data, please back up your original MS SQL database to .bak file.
- Get the FTPS information on the "FTPS Server" page.
- Upload your backup file to the FTP server.
If you need help, please refer to the documentation.
4. Restore database from the backup via SQL Server Management Studio (SSMS)
Step 1: connect to SQL Server via SSMS
Please refer to the documentation Connecting to SQL Server Using SSMS to connect to SQL Server by super user.
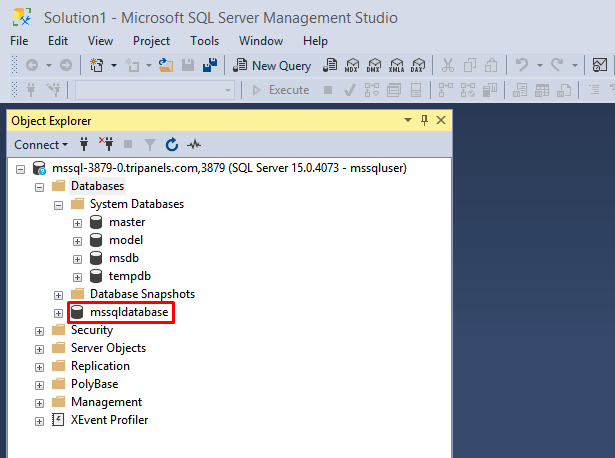
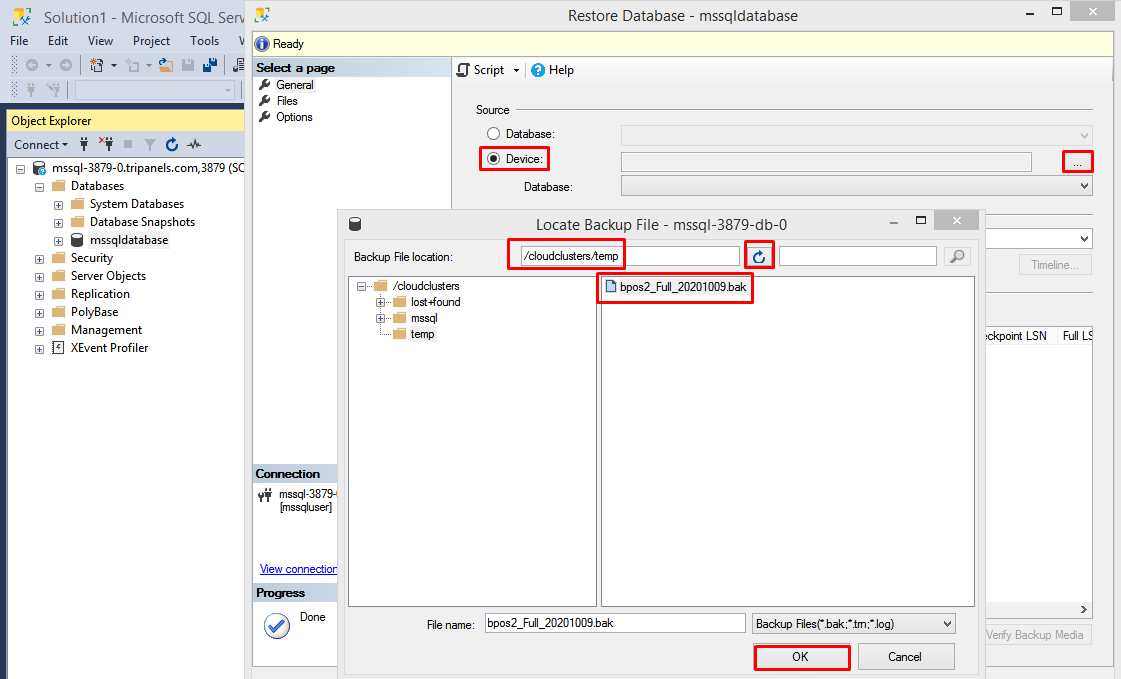
Step 2: locate the database backup file
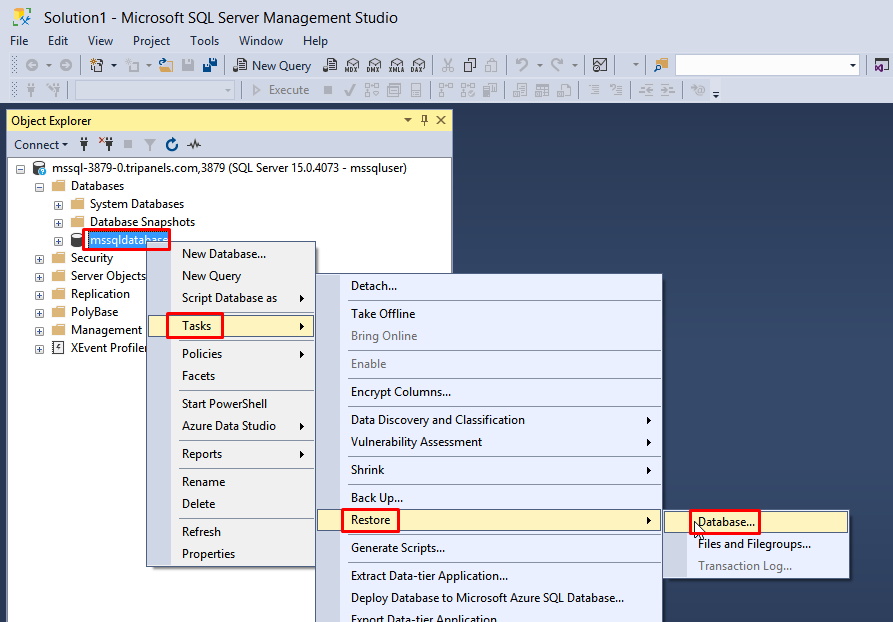
Right click the database name > Tasks > Restore > Database.
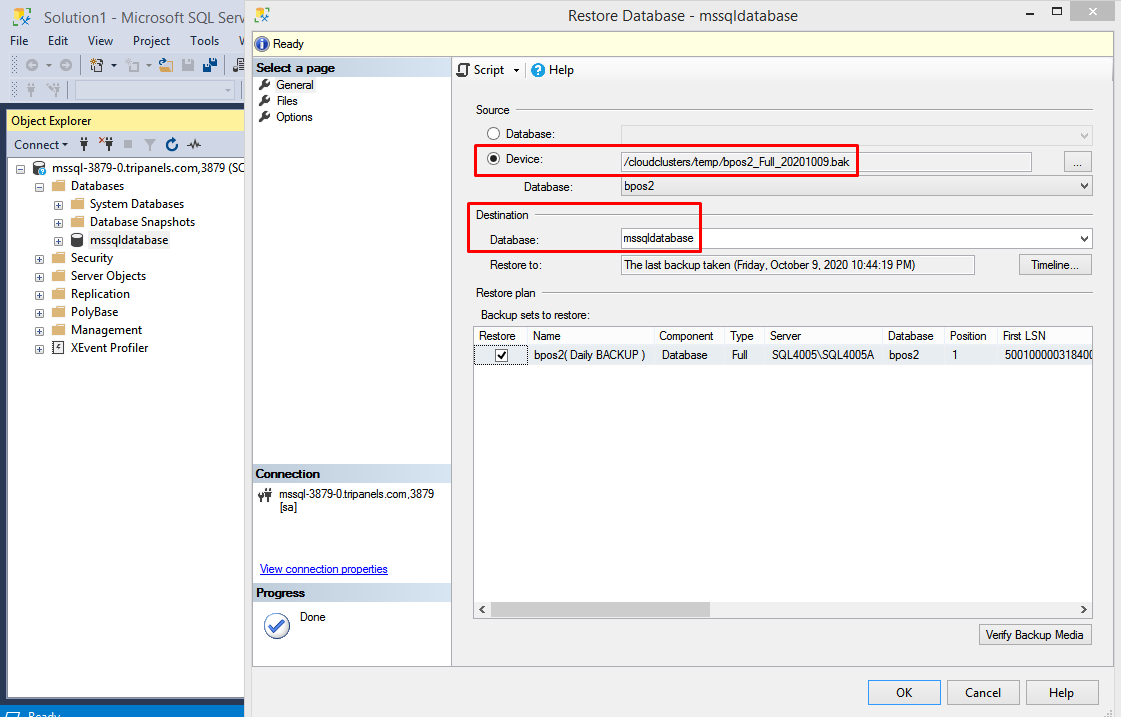
Step 3: restore the database backup
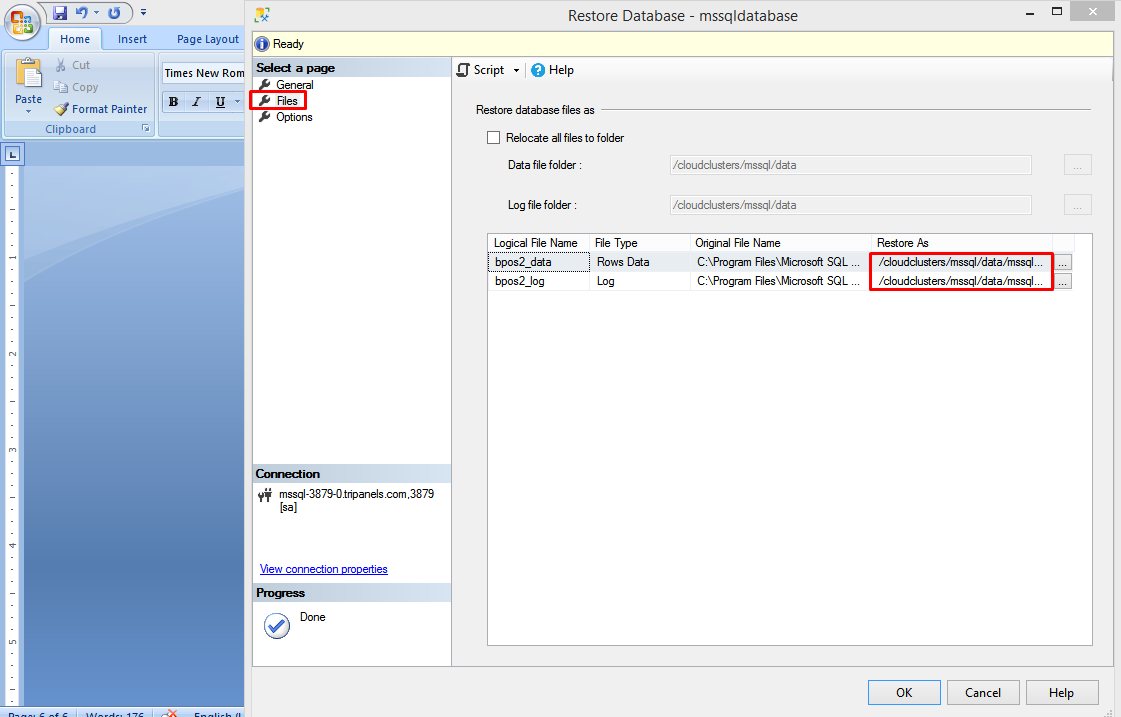
On the "Files" page, check the file path if it is right or wrong. Usually, the data file path is /cloudclusters/mssql/data/{databasename}_data.mdf The log file is /cloudclusters/mssql/data/{databasename}_log.ldf
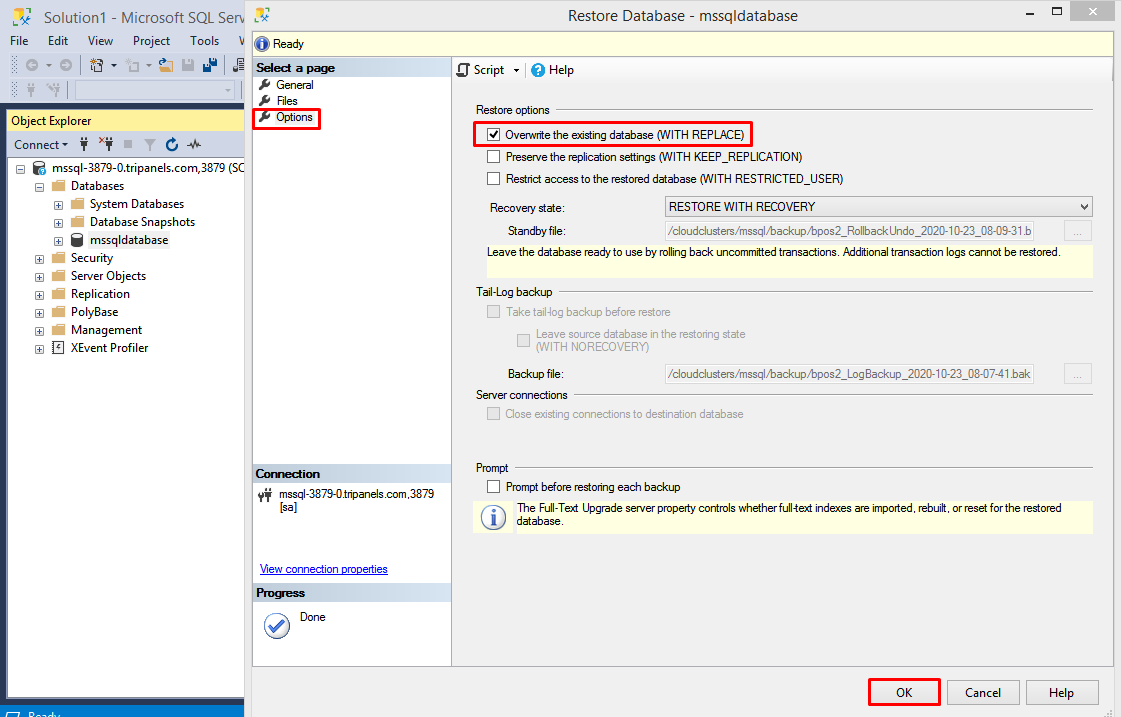
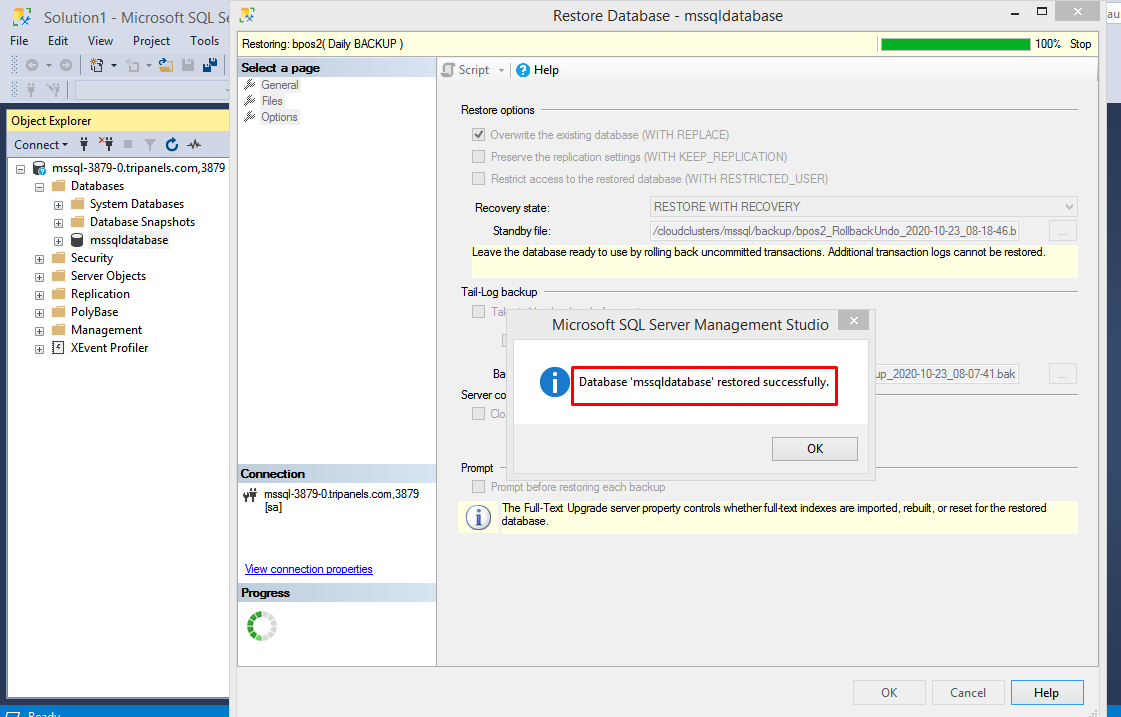
On the "Options" page, check "Overwrite the existing database(WITH REPLACE)", then click "OK" to start the restoration.
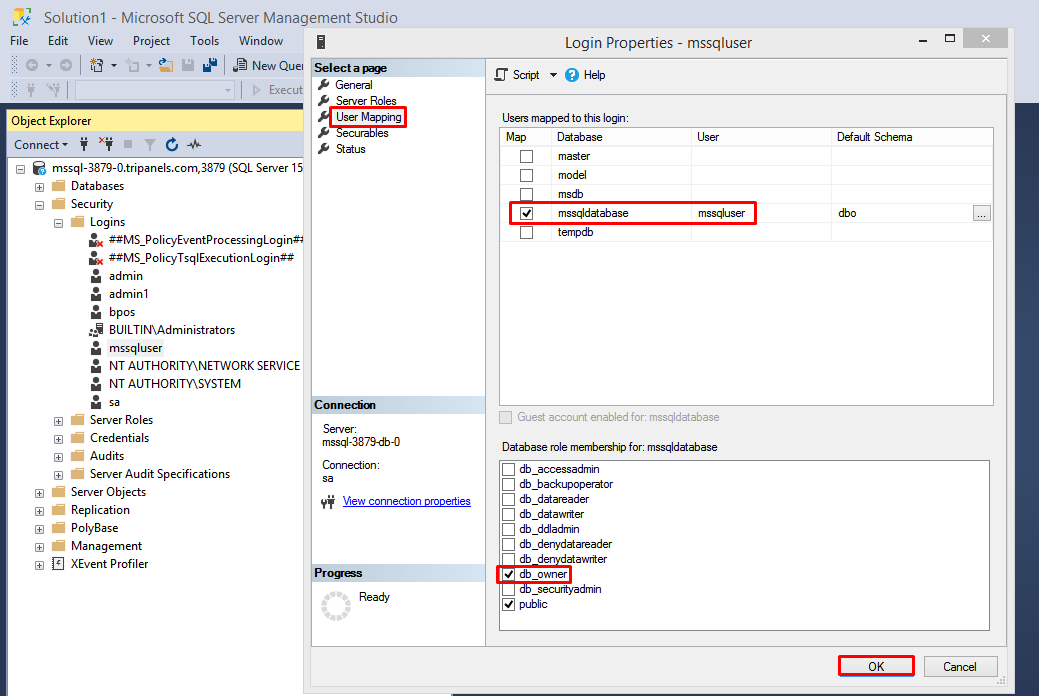
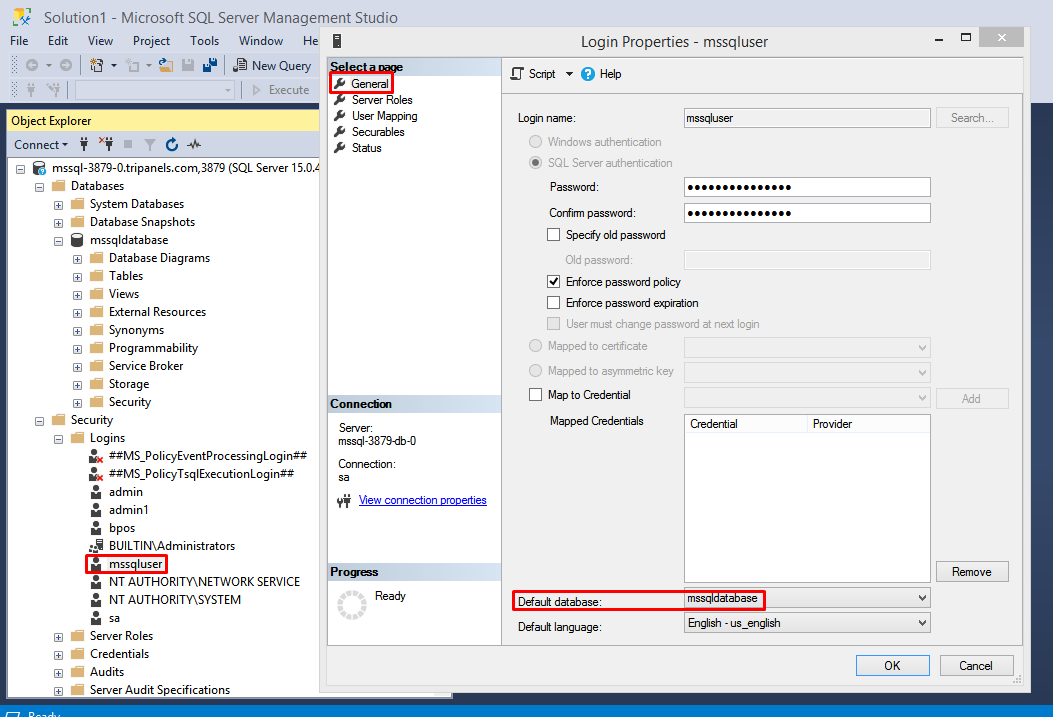
5. Redo the user mapping
Right click the database user under Security > Logins menu. Change the default database to the new database on the General page.
On the User Mapping page, check the right database and user, and add the db_owner role for the database. Click "OK" to save the changes.