Connecting to SQL Server from Windows with ODBC Data Source
This article explains how to connect to Microsoft SQL Server with ODBC Data Source from Windows.
1. Locate the target SQL Server deployment
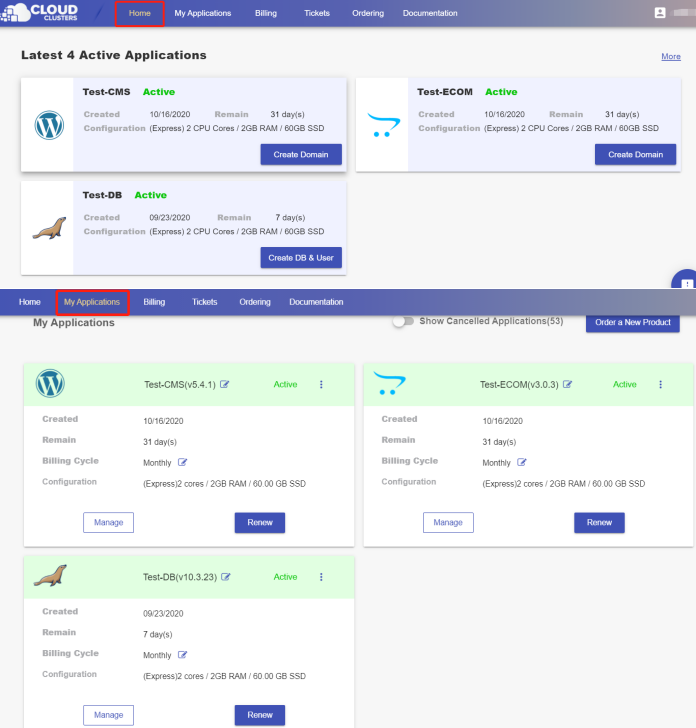
Please log in to the Control Panel https://clients.cloudclusters.io/ with your credentials and locate your target deployment on the Home page or the My Applications page.
2. Creating Databases and Users
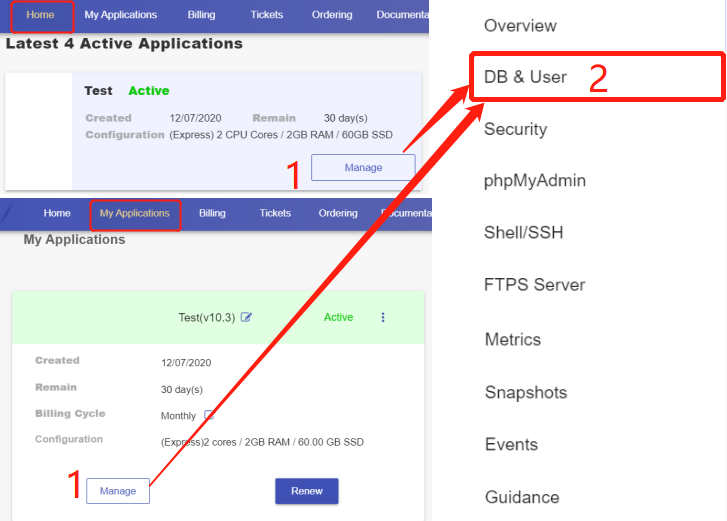
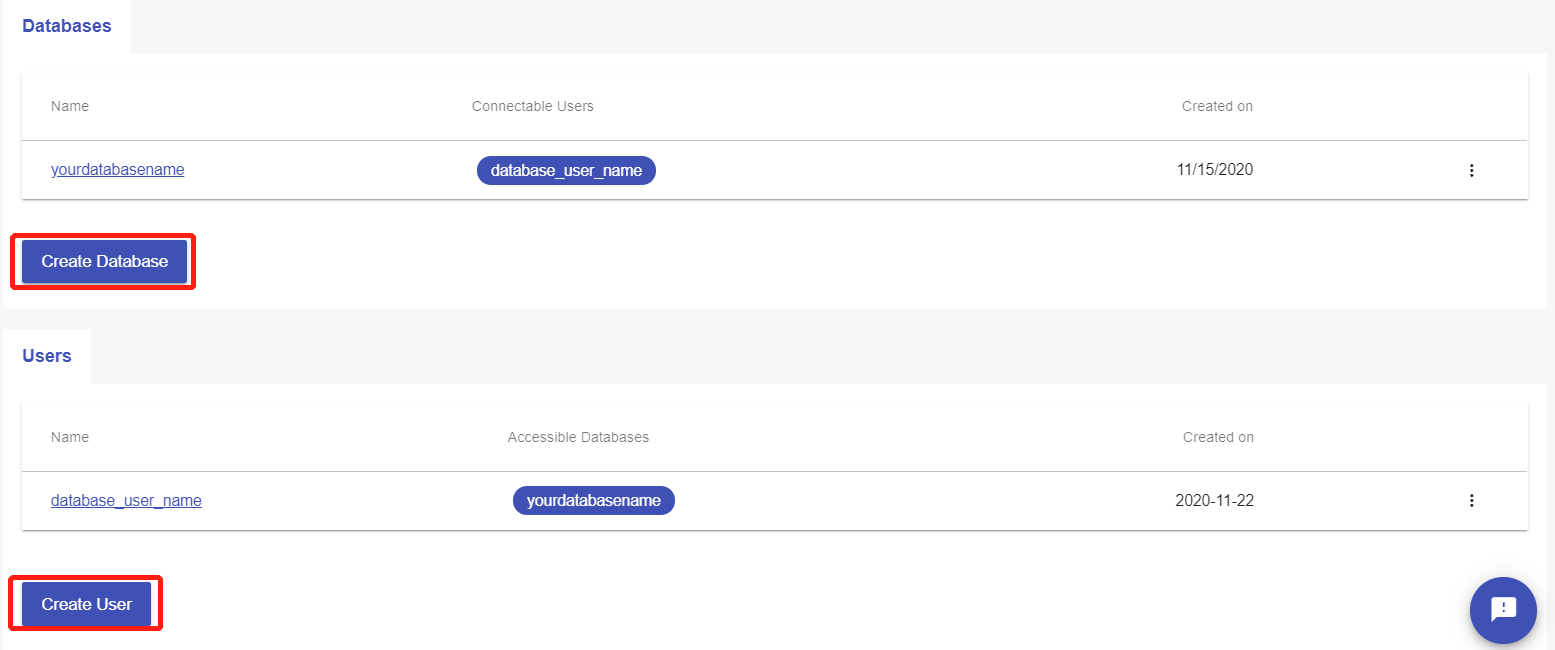
If there is not any database or user, create the database and user first. Click the "Manage" button on the Home page or the My Applications page. Then Click the “DB & User” tab in the menu bar on the left. On the page, you can create your databases and users.
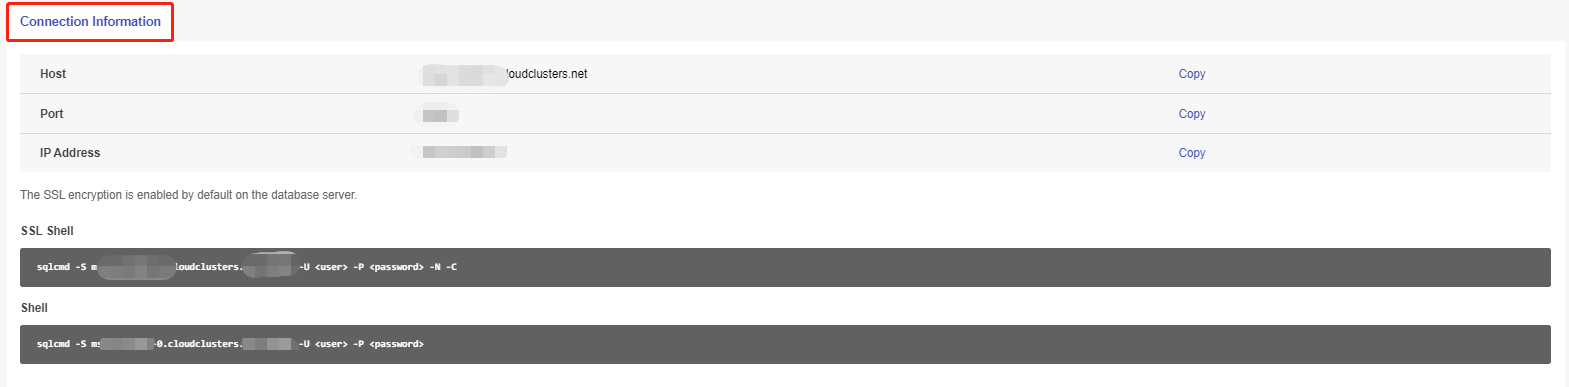
3. Get the Host information
Go to the "Connection Information" section on the "Overview" page to get the Host .
4. Configure ODBC Data Source to connect to SQL Server
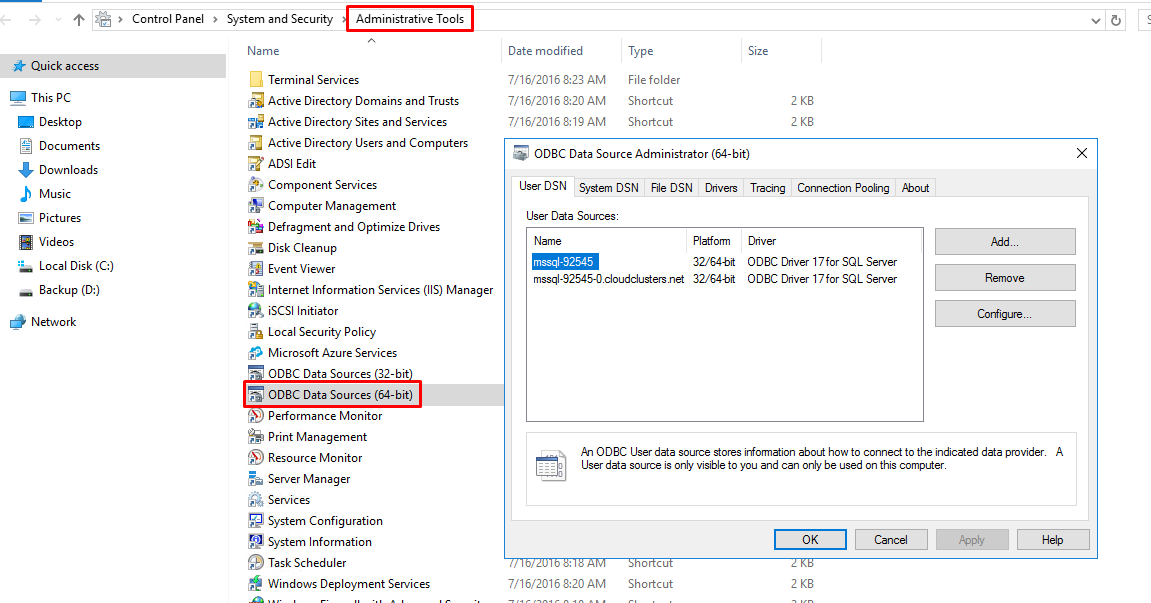
Step 1: Open ODBC Data Sources (64-bit) in Windows Server
Go to Control Panel\System and Security\Administrative Tools and double-click ODBC Data Source (64-bit) to open it.
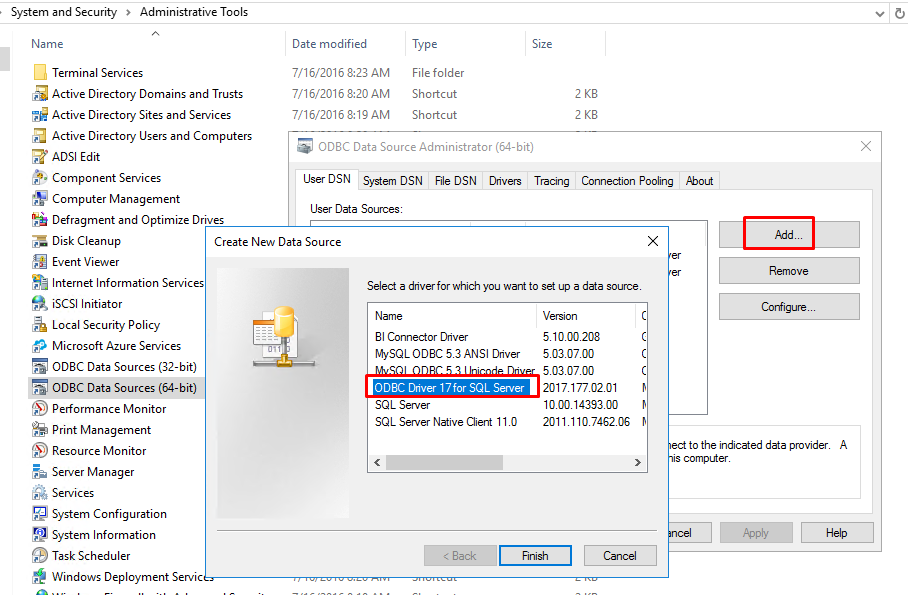
Step 2: Create a New Data Source
Click “Add” to create a new data source; then, choose “ODBC Driver 17 for SQL Server.”
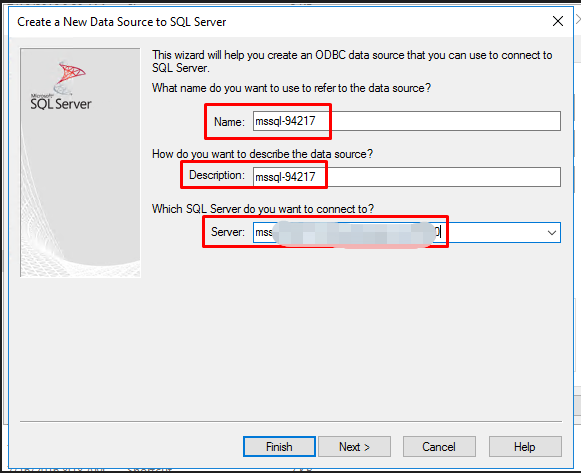
Step 3: Enter the Server Information
Name: specify a name for the data source. Description: any descriptive information that you desire. Server: the host name we provided in the client panel.
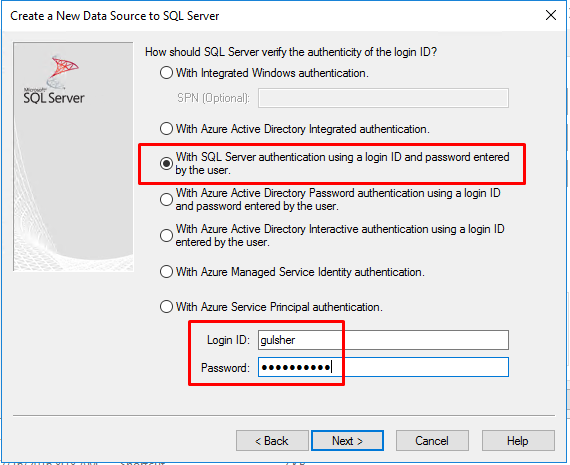
Step 4: Configure the Authentication Method
Tick on the third option (With SQL Server authentication using a login ID and password entered by the user) and enter the database user name and its password. Then, click the Next button.
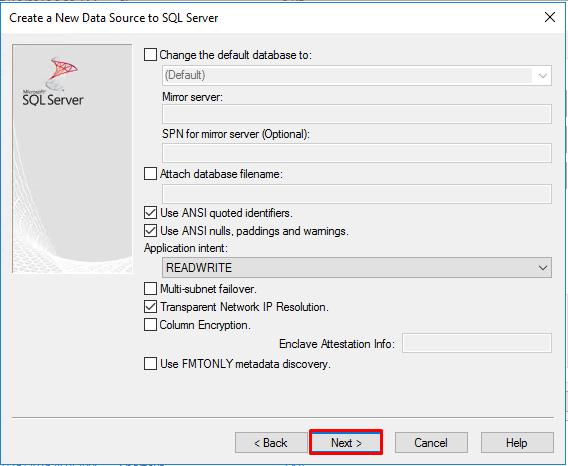
Step 5: Set the default Database
Keep the database (Default) as the default database and click Next.
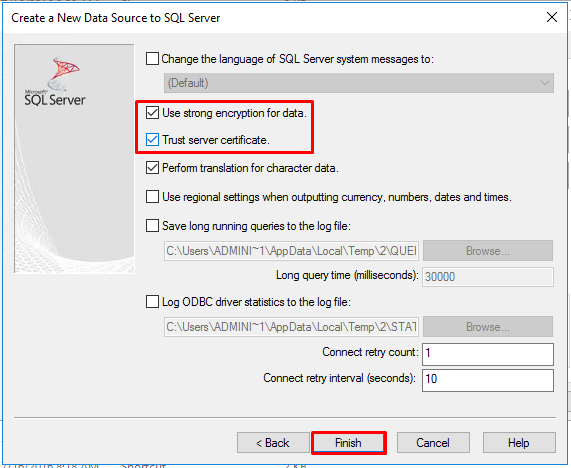
Step 6: Other Settings
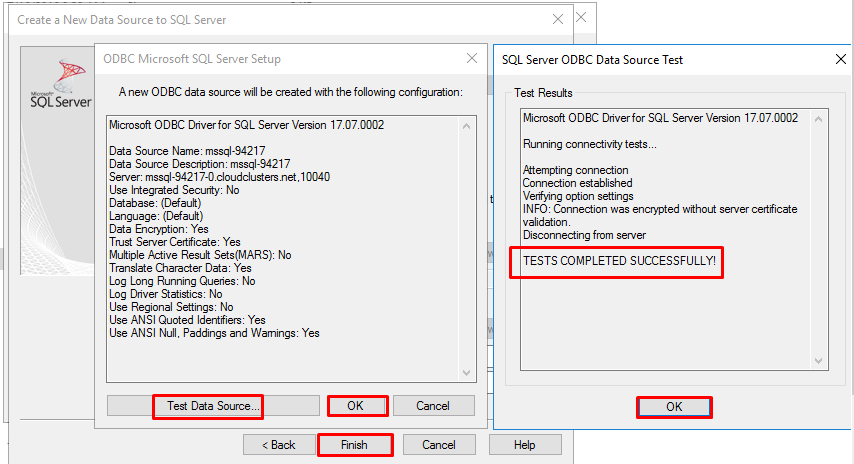
Check options "Use strong encryption for data" and "Trust server certificate" on. After that, click Finish.
Step 7: Test a Successful Connections
Test the data source and save the settings.